Check out the step by step guide too!
httpvh://www.youtube.com/watch?v=CO1VkHt_6tE
Check out the step by step guide too!
httpvh://www.youtube.com/watch?v=CO1VkHt_6tE
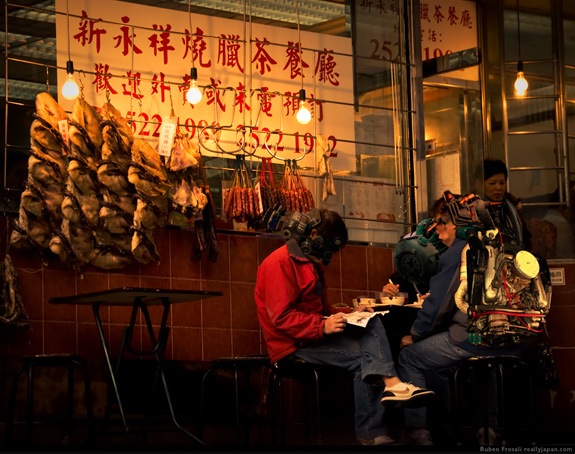
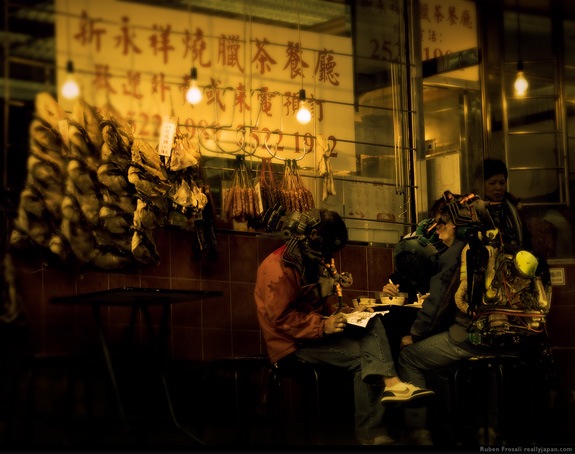
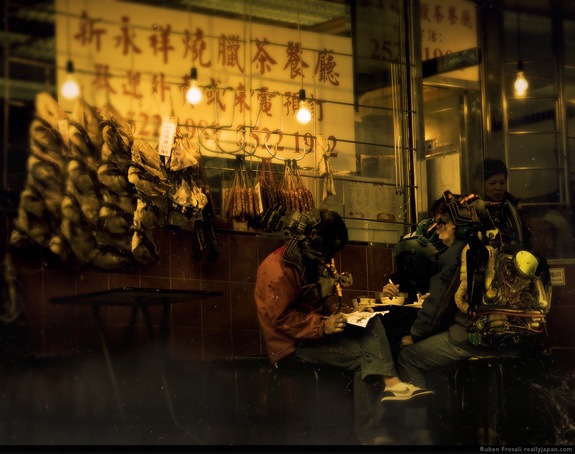
I thought it would be cool to show you step by step how I created the image Steampunk Cyborgs in Hong Kong.
Basically it was quite simple and quick to make, since I’ve not used 3D renderings, it took about 2 hours.

Ok, here it is, let’s start!
(If you are interested, there’s a video version too!)
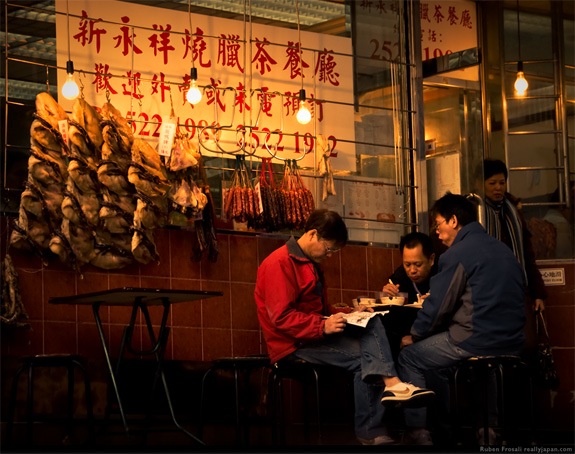
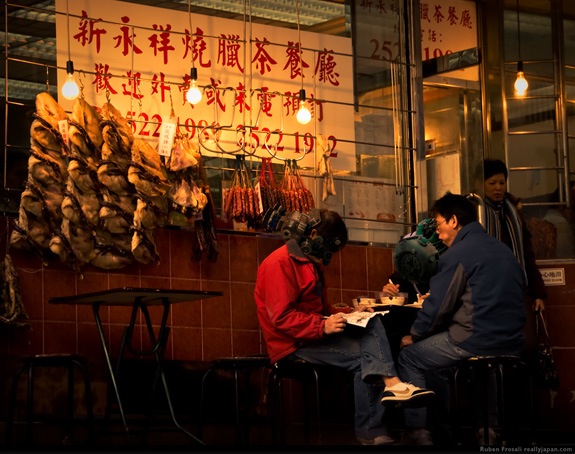
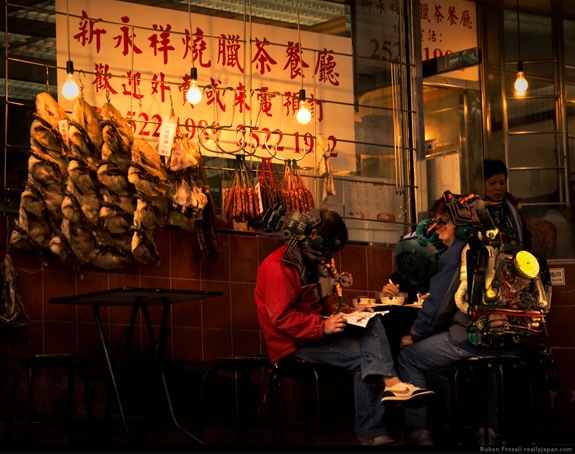
This is the original picture, I just adjusted the colors in Adobe Lightroom.
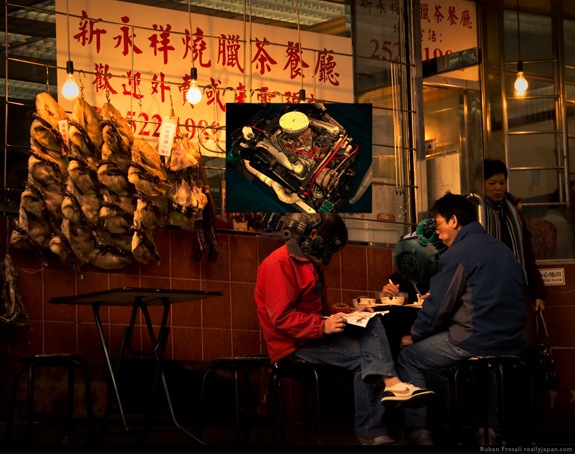
Step 1
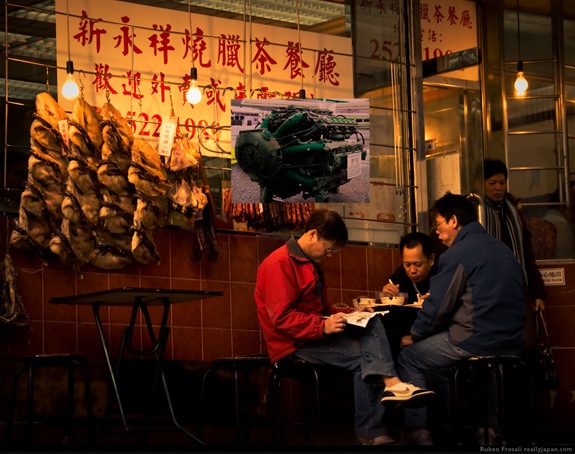
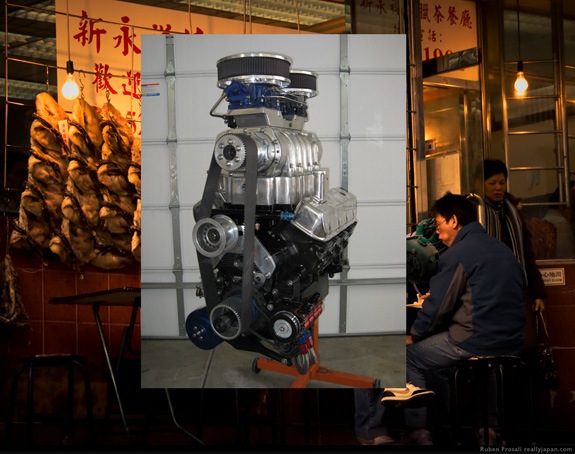
I searched on Internet for a ‘ship engine’, and I found this steampunkish thing. Actually, at the beginning I wasn’t too sure to create steampunk cyborgs (I was more a cyberpunk man, let’s say..), but as soon as I found this image I decided to go in that direction. One important thing was to find images with the right perspective, since I needed to mix them with the original picture.
Anyway, I dragged the image of the engine in the document and adjusted the colors using Match Color in Photoshop.
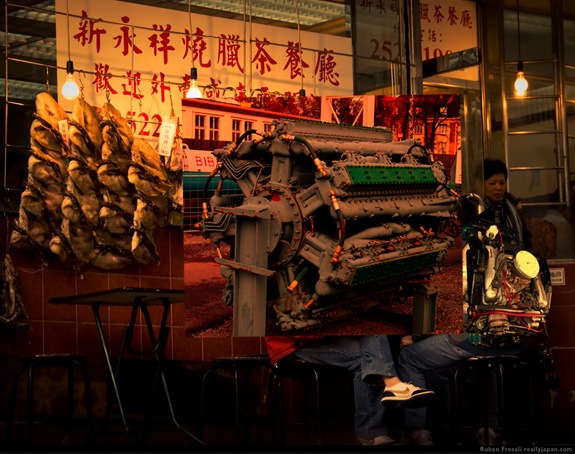
Step 2
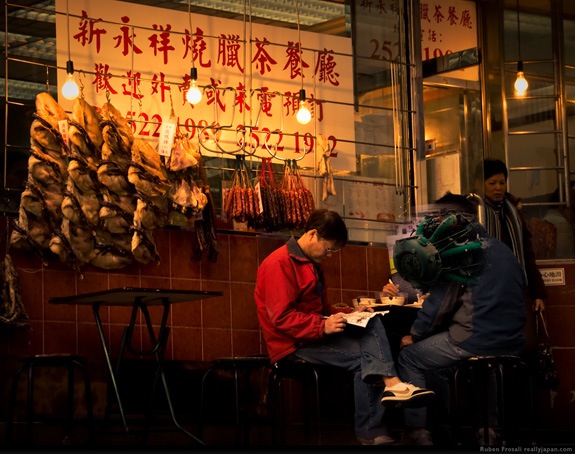
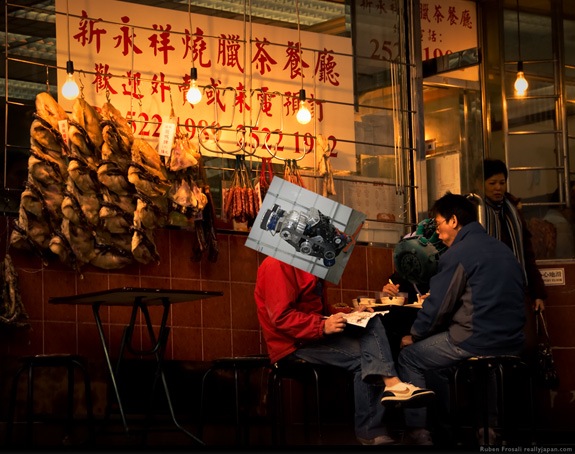
I moved the engine overlapping the face of the man in the middle and started working on the mask.
It takes some time to mask correctly the object. Just try to follow the lines and the shape of the object you are masking.
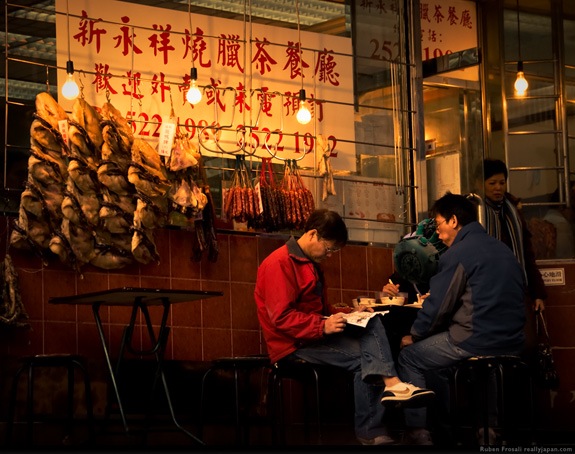
Step 3
Ok, another engine here..
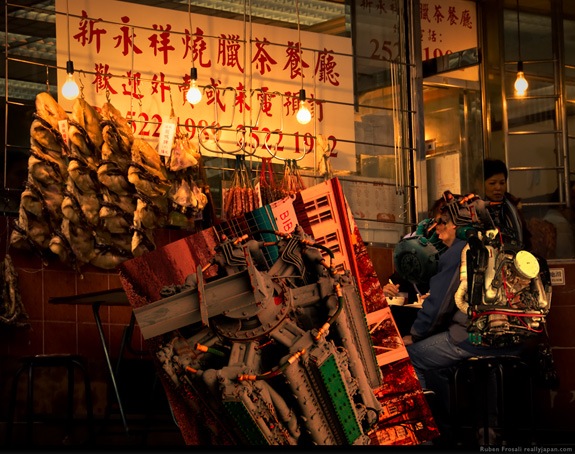
Step 4
Now let’s work on the man on the left. The color of the engine doesn’t match the background, so I need again the Match Color.
Now it’s much better.
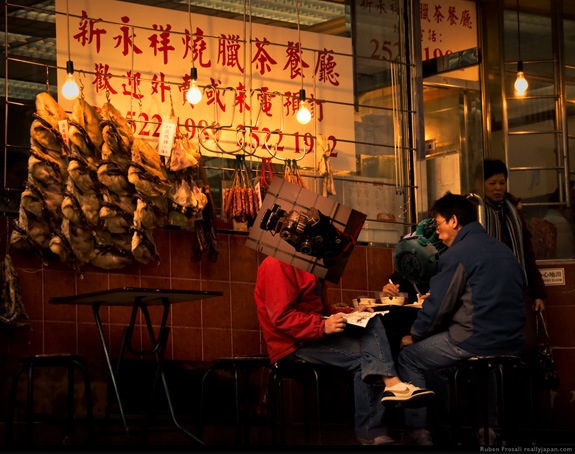
Step 5
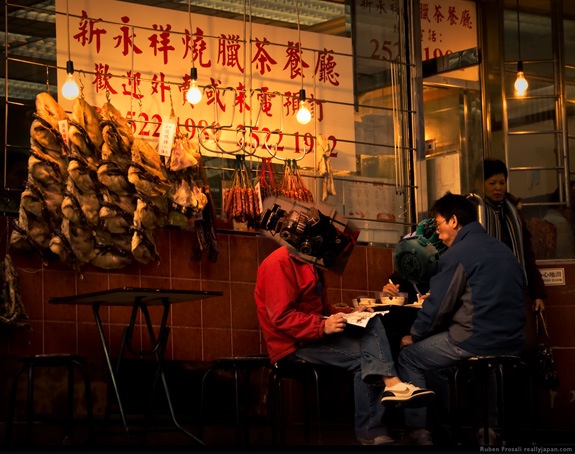
It’s time to mask the object.
Here we go. I also lighten up the engine to show better the mechanical parts.
Step 6
Another engine from Internet and again, Match Color to match the object color to the background image.
Step 7

Let’s move in on the back of the man on the right. Looks like the device used by the Ghostbusters!
Step 8
Now it’s time to work on the mask.
Here we go.
Step 9
Another engine.. match color.. and let’s move it.
Step 10
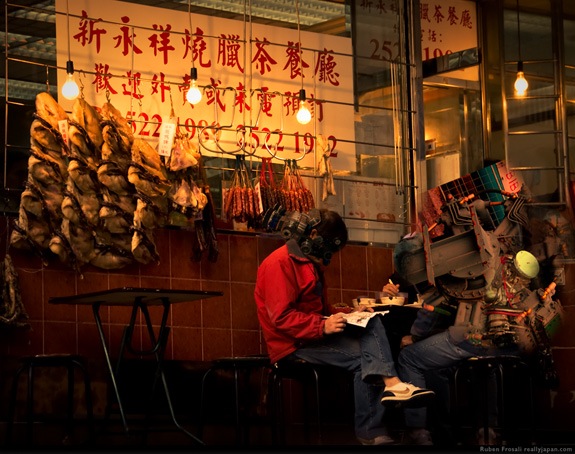
Some masking..
Step 11
Yeah.. again.. Steampunkish Overkill!
Step 12
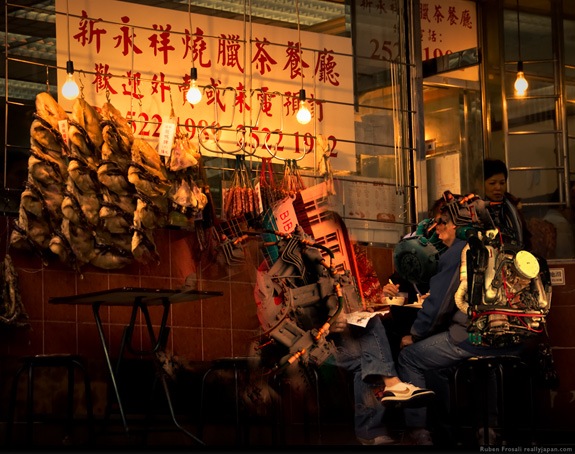
Let’s move it and do some masking..

Pretty satisfied with the masking. Now the cyborg on the left has some weird mechanical device on his head and a cool respirator!
Step 13
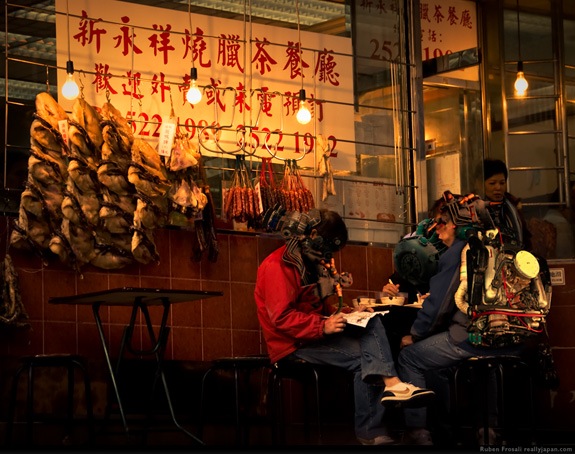
Let’s add some shadows below the mechanical parts to enhance the 3D volume of the objects. I created a 50% gray overlay mode layer between the background and the robotic parts and painted it with the Burn Tool.
Step 14
This time I used a black brush, very soft, on a layer (Multiply mode) in front of all the other layers and painted some shadows.
Step 15
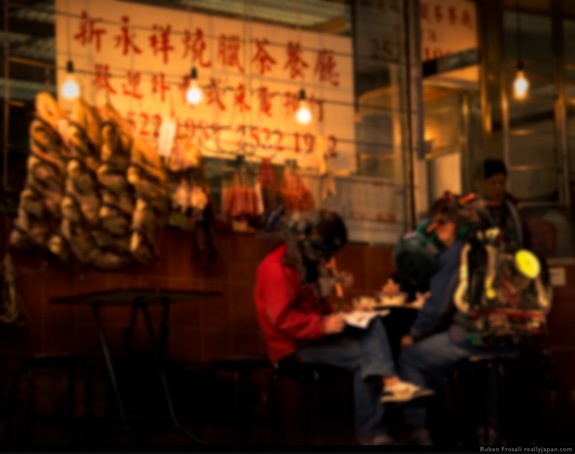
New Layer and Command + Alt + Shift + E (I think Command is Ctrl on windows but I’m not sure) to create a snapshot flattening all the layers in a single layer. Now I applied some blur..
And masked this layer!
I used a radial gradient to mask the blurred level. I centered the gradient on the table. This help to focus the scene on the three cyborgs slightly blurring the background.
Step 16
Let’s load some dirty textures and apply them to the cyborgs (you know, steampunk cyborgs don’t like to take shower).
You can see the texture on the red jacked, the hand, and on the ghostbuster device.

Step 17

Let’s desaturate a little the image.
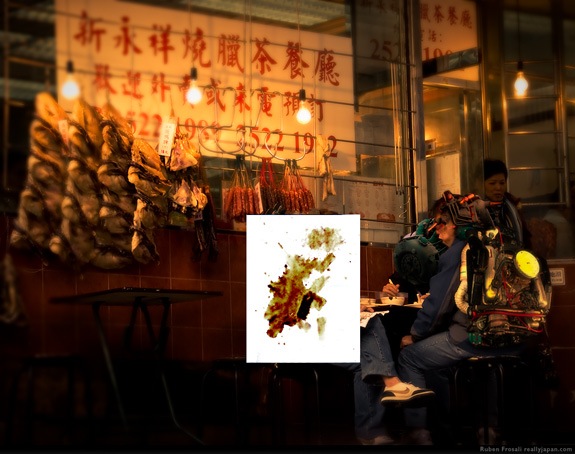
Step 18
Oh God photoshop crashed! Ok, just kidding. I created a layer and filled it with this color.. then I set it on Overlay Mode.
Step 19
Let’s add some contrast…
Step 20

Don’t you want some smoke in the image? So, with a brush on a new layer paint some brush (very low opacity!)
Step 20 + the dirty textures
Now let’s add the famous Dirty dusty texture I made! Remember, screen mode this time!
(oh, and another secret texture on the top of the image.. I’ll release it soon anyway)
That’s all!
If I say “Lens Flare”, what’s the first thing coming to your mind?
Well, for me it’s something like this:

Yeah, pretty scary, isn’t it? Something from the 90’s.. remember Geocities? Fortunately now we have social websites with great graphic design and usability.. you know something like myspace (doh!).
However, I like Lens Flare, and I use this effect on many photos to enhance the light. Take a look for example to this shot:
There are two lens flare, one on the left, slightly orange/red, and another on the right, white.
The lens flare effect in photoshop is not bad, however has some problems:
…or no?
Actually you can use the lens flare effect in a very dynamic way, like a… smart filter.
Create a non-destructive, smart Lens Flare filter.


Apply the LF on a point in the image.
Now you have your LF smart filter.. however there’s no easy way to point you LF where you like. The best way to do it is this one:


Customize the Lens Flare effect
You can change position, brightness and type as you like with the Smart LF effect… But let’s see you don’t like the color and you want to change it? Or maybe you want something more blurred?
Since you’re working on a Smart Object with Smart Filter you can add many other smart filters to modify your lens flare.
If you want to apply a blur on your LF, just select Filter>Blur>Gaussian Blur. Now you can adjust your blur effect on the lens flare. Of course, after you’ve applied the effect you’re free to modify or delete it as you like in a non-destructive way.
You can also adjust the opacity and the blending mode of the single effects just clicking on the icon on the right

How to change the color of the lens flare
It’s pretty simple, and the procedure is non-destructive.


A Diffuse Light
You can create many lens flare.. however also some lighting effect, for example a diffuse light, just select LF Dialog: Brightness > 100% – Lens Type : 105mm Prime and in Hue/Sat select the color of the light source in the image.
Tips
Well, it’s all.. for now! Happy Lens Flare!


 Last
Last FriendFeed
 Twitter
 StumbleUpon
 Facebook
 Digg
Digg Delicious
 Youtube