If I say “Lens Flare”, what’s the first thing coming to your mind?
Well, for me it’s something like this:

Yeah, pretty scary, isn’t it? Something from the 90’s.. remember Geocities? Fortunately now we have social websites with great graphic design and usability.. you know something like myspace (doh!).
However, I like Lens Flare, and I use this effect on many photos to enhance the light. Take a look for example to this shot:
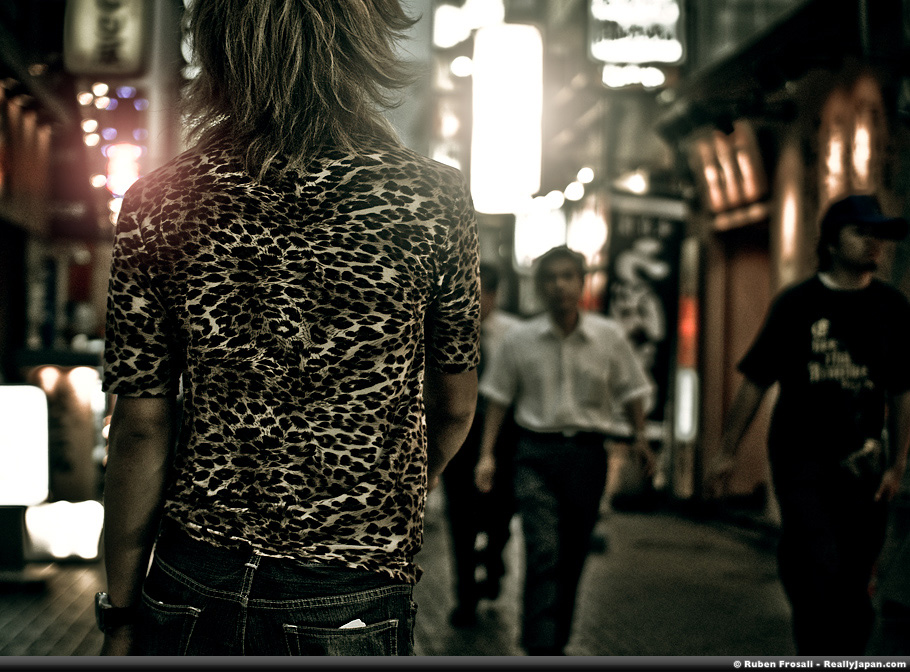
There are two lens flare, one on the left, slightly orange/red, and another on the right, white.
The lens flare effect in photoshop is not bad, however has some problems:
- You have to apply the effect on the picture in a destructive way
- There are just four kinds of LF
- You cannot change the color
- ..and anyway, there are no way to change params after you’ve applied the effect!
…or no?
Actually you can use the lens flare effect in a very dynamic way, like a… smart filter.
Create a non-destructive, smart Lens Flare filter.
- Open a photo you want to apply a LF on
- Create a New Layer using Command+Shift+N. This will show the New Layer Dialog.
- Select Mode: Hard Light and check Fill with Hard-Light-neutral color 50% gray and click ok, creating the layer.

- Now let’s convert this layer to a Smart Object… long story short, a layer you can adjust in a non-destructive way.. Select Layer > Smart Objects > Convert to Smart Object.

- Now it’s time to apply our Lens Flare filter, so Filter > Render > Lens Flare.
- In the Lens Flare Dialog, you should be able to customize your lens flare effect.. especially where you to want apply the effect.. however, since we are working on a 50% gray layer you’ll see just a big gray area. But let’s just press OK for now and apply the effect.
- Let’s give a look to the LF Layer

Well, that’s a Smart Filter. A filter you can adjust as you like in a non-destructive way.
As you can see on the image, the lens flare renders perfectly. However, since we have used the effect on a Hard Light 50% gray smart layer, the Lens Flare is not messing up with your photo.. it’s non-destructive!
- To move and adjust the Lens Flare effect just double click on Lens Flare, under Smart Filters (in the Layers Palette).. You can adjust your LF and change it as you like.. let’s proceed.
Apply the LF on a point in the image.
Now you have your LF smart filter.. however there’s no easy way to point you LF where you like. The best way to do it is this one:
- Activate your Info palette (Window > Info) if it’s not already activated.

Here it is.. basically it tells you the RGB color and the XY position of your mouse cursor on the photo. Press on the + (the cross) on the left of that X: Y:, and select Pixels (to see the XY values in pixels).
- Now move your mouse in the photo where you want to apply the lens flare effect, and check the XY values.. let’s say they are X: 250 Y:150
- Double click on the Lens Flare Smart Filter.
- Now, Click on the Flare Center preview while pressing the ALT/OPTION key… that will open thePrecise Flare Center Dialog.

Write here your X and Y!
- Here it is, you correctly placed your Smart LF Effect where you want!
Customize the Lens Flare effect
You can change position, brightness and type as you like with the Smart LF effect… But let’s see you don’t like the color and you want to change it? Or maybe you want something more blurred?
Since you’re working on a Smart Object with Smart Filter you can add many other smart filters to modify your lens flare.
If you want to apply a blur on your LF, just select Filter>Blur>Gaussian Blur. Now you can adjust your blur effect on the lens flare. Of course, after you’ve applied the effect you’re free to modify or delete it as you like in a non-destructive way.
You can also adjust the opacity and the blending mode of the single effects just clicking on the icon on the right

How to change the color of the lens flare
It’s pretty simple, and the procedure is non-destructive.
- Create a new Hue/Saturation Adjustment Layer (you can also use a Color Balance to have more control if you like) and press ok on the Dialog.

- Now press Command+Alt+G. In this way you link the Hue/Saturation Adj. Layer to the LF smart filter, not affecting the photo.

A small arrow will tell you: “Yeah, that’s right man!”
- Now just double click on the Hue/Saturation Layer to adjust your effect!
You can use the Hue/Saturation sliders to adjust the color and the saturation.. however do not touch the Lightness, since it will affect the brightness of the image.
- Feel free to change colors/saturation as you like and remember you can still double click on the Lens Flare layer to adjust position, brightness and the kind of LF!
A Diffuse Light
You can create many lens flare.. however also some lighting effect, for example a diffuse light, just select LF Dialog: Brightness > 100% – Lens Type : 105mm Prime and in Hue/Sat select the color of the light source in the image.
Tips
- Place the effect on a point in the photo where there’s already a light source. You want to apply the effect where it’s plausible.
- The color of the light/LF should match the color of the light source.
- Paint a mask to adjust how the light/lensflare effect affects the different parts of the image (that means, look where the shadows are in your photo and try to apply the effect in a realistic way. Slightly decrease the opacity of the effect on a dark zone, or if you prefer draw exactly the light where you want.)
- Do Not Overdo!
- You can apply as many LF effect you want on a single Smart Object
Well, it’s all.. for now! Happy Lens Flare!


 Last
Last FriendFeed
 Twitter
 StumbleUpon
 Facebook
 Digg
Digg Delicious
 Youtube